
|
Setting up your Hardware |
|
|
Setting up your Hardware |
The first thing you will need to do before you can use your hardware is to setup the hardware device drivers. The instructions for the device driver setup will differ between the different hardware devices that Vecitr supports. For this reason, it is recommended that the driver setup instructions supplied with your hardware are followed.
2. Test your hardwarea. Close Vectir, plug your hardware device into an available USB port then open Vectir again. Expand the Hardware node of the Setup panel and locate the setup option for your hardware device.
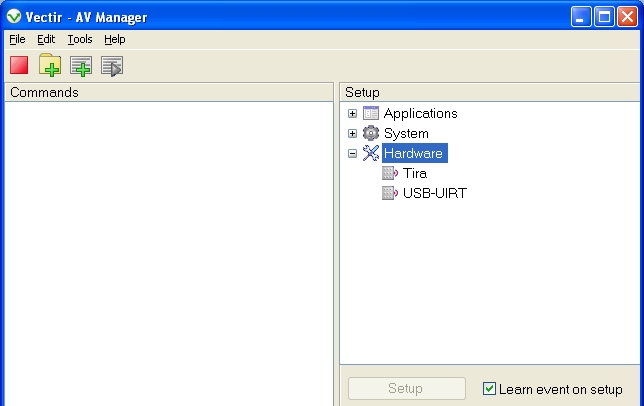
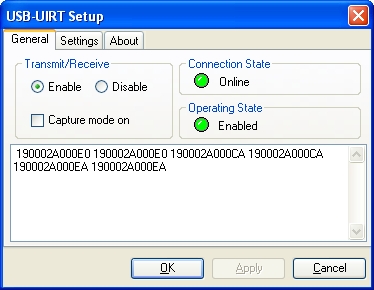
b. Open the setup dialog for your hardware by double clicking on the hardware icon. Alternatively, you can click on the hardware icon then on the 'Setup' button. The setup dialog for your hardware should now be visible. The USB-UIRT dialog is displayed below as an example.

c. Verify that Vectir has successfully connected to your hardware device. The connection state for the USB-UIRT and Tira devices,
is indicated by the "Connection State" LED on hardware setup dialog. If the LED is green, it means that Vectir has successfully
connected to your hardware device. If the LED is red, it means that Vectir has not been able to connect to your hardware device.
If the LED is red and you are using the Tira device, it may mean that the wrong COM port is selected. Select the 'Settings' tab
and make sure that the COM port matches the COM port that your Tira device was installed on.
d. Try sending some data to your hardware from a remote control, or other device supported by your hardware. The received data should show up in the data text box as displayed below for the USB-UIRT device. If some data is received, it means that your hardware is successfully setup and ready to use!
e. View the command setup page to learn how to setup some commands and start using Vectir.